The Golden Journey: Hatching Jumbo Italian Quail Eggs!
There's something truly magical about the quiet anticipation of eggs in an incubator, and for those who raise quail, the Jumbo Italian variety offers an especially rewarding experience. Known for their impressive size, gentle temperament, and beautiful golden plumage, these quail are a fantastic choice for both hobbyists and those looking for a productive dual-purpose bird. If you're considering embarking on the delightful journey of hatching Jumbo Italian Quail eggs, here’s what you need to know to give your little golden nuggets the best start!

Why Choose Jumbo Italian Quail?
Before we dive into the nitty-gritty of hatching, let's briefly touch on why Jumbo Italians are so beloved:
-
Size Matters: As their name suggests, these are larger than your average Coturnix quail, making them excellent for meat production while still being prolific layers.
-
Golden Beauty: Their stunning golden-brown and cream feathering is a visual treat, adding a touch of elegance to any aviary.
-
Docile Nature: Generally calm and easy to handle, they're a joy to interact with.
-
Excellent Layers: Hens are reliable egg producers, providing a steady supply of delicious speckled eggs.
The Hatching Essentials: Your Incubator Setup
Successful hatching hinges on a stable and well-maintained environment.
-
The Incubator: Whether you opt for an automatic turner or a manual one, ensure your incubator is clean, sanitized, and functioning correctly. Always do a test run before placing eggs inside.
-
Temperature is Key: For Coturnix quail, maintaining a consistent temperature of 99.5-100.5°F (37.5-38.1°C) is crucial. Fluctuations can drastically impact hatch rates.
-
Humidity Control: Humidity is often overlooked but vital. For the first 14 days (incubation period), aim for 45-55% humidity. In the final three days (lockdown), bump it up to 65-75% to help chicks break free from the shell. A hygrometer is your best friend here!
-
Turning: Eggs need to be turned regularly to prevent the embryo from sticking to the shell. Automatic turners handle this every few hours. If turning manually, aim for at least 3-5 times a day, always with clean hands. Stop turning at Day 14.
Selecting Your Eggs: The Foundation of Success
The quality of your hatching eggs directly impacts your hatch rate.
-
Source Wisely: Obtain eggs from a reputable breeder known for healthy, productive stock.
-
Freshness: The fresher the egg, the better the hatch rate. Ideally, hatch eggs collected within 7-10 days.
-
Inspection: Gently inspect eggs for cracks, abnormalities, or excessive dirt. Only set clean, well-formed eggs. Avoid washing them, as this removes the protective bloom.
The Incubation Journey: Days 1-17
Days 1-14: Incubation Period
This is where consistency is paramount. Maintain your temperature and humidity, and ensure regular turning. You might want to candle your eggs around day 7 to check for fertility and embryo development. Look for a spider-like network of blood vessels.
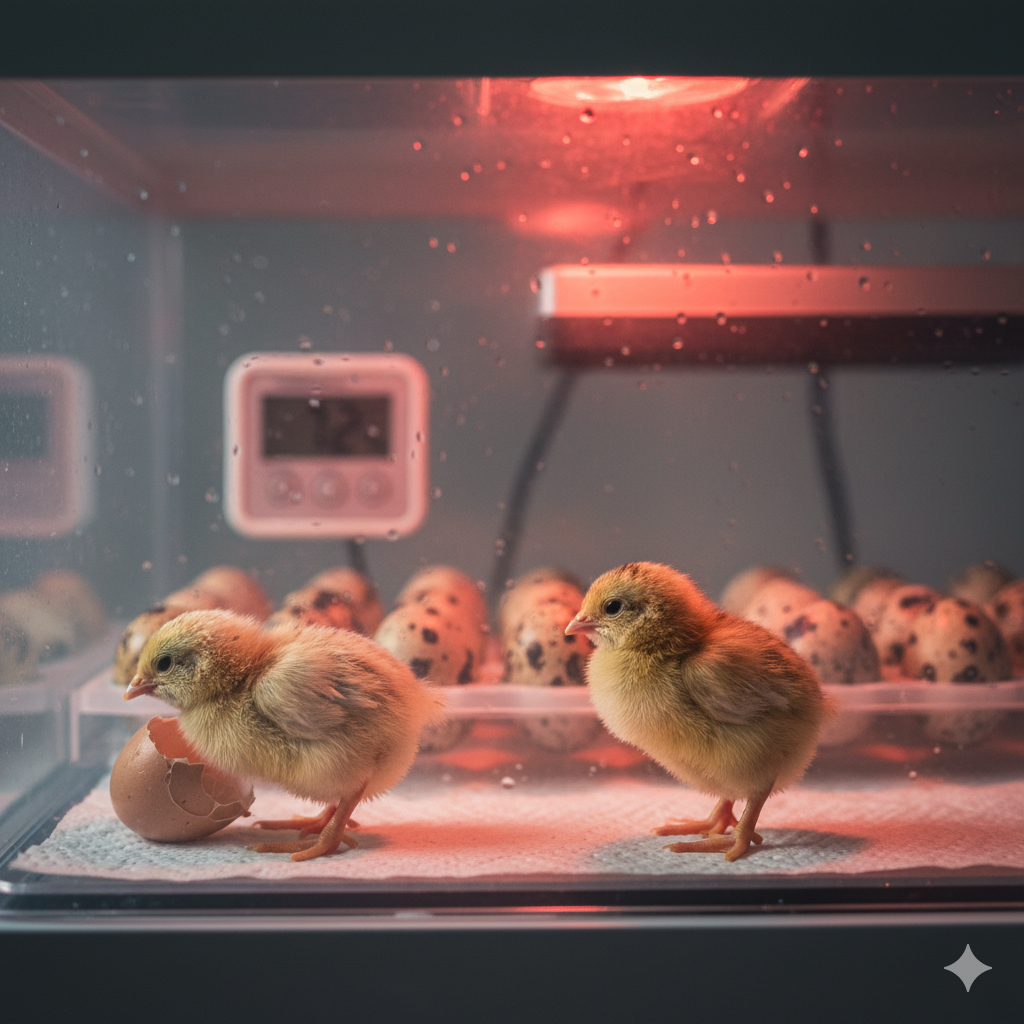
Day 14: Lockdown!
This is a critical transition!
-
Stop Turning: Remove any automatic egg turners.
-
Increase Humidity: Raise the humidity to 65-75%. This softens the shell membranes, making it easier for chicks to pip and hatch.
-
Hands Off: Resist the urge to open the incubator! Each time you open it, you lose precious heat and humidity, which can shrink-wrap chicks inside their shells.
Hatch Day! (Typically Days 16-18)
Excitement builds! You'll likely start hearing faint peeping around day 16.
-
Pipping: The chick will first make a tiny hole in the shell (the "pip").
-
Zipping: Over the next 12-24 hours, it will gradually expand this hole, "zipping" around the shell until it can push its way out.
-
Patience is a Virtue: It can take many hours for a chick to hatch once it pips. Let them work at their own pace. Resist the urge to "help" a struggling chick unless it's truly shrink-wrapped and you know what you're doing – intervening too early can do more harm than good.
-
Drying Off: Once hatched, leave the chicks in the incubator for a few hours to dry off and fluff up. Their first meal comes from absorbing the yolk sac, so they don't need food or water immediately.
Brooder Time: Welcoming Your New Arrivals
Once your little golden bundles are fluffy and active, it's time to move them to a pre-warmed brooder.
-
Heat Source: A heat lamp or brooder plate set to around 95-100°F (35-37.7°C) for the first week, gradually reducing the temperature by 5 degrees each week.
-
Food & Water: Provide a shallow water dish with marbles or stones (to prevent drowning) and a high-quality game bird starter feed (around 24-28% protein).
-
Space: Ensure they have enough space to move away from the heat source if they get too warm.
Hatching Jumbo Italian Quail eggs is a deeply rewarding experience, connecting you to the miracle of life. With careful attention to detail and a sprinkle of patience, you'll soon be enjoying the lively chirps and golden beauty of your newly hatched flock!
Happy Hatching!